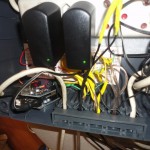
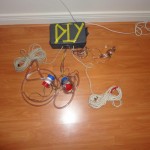
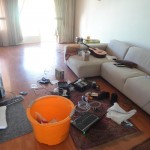
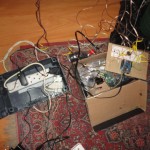
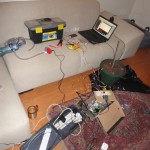
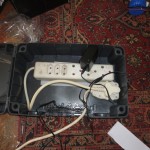
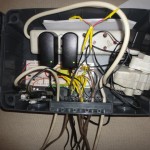
So this is going to be a rather strange post as at the time of writing its not actually implemented, the system is built in a waterproof container as well as the networking setup and so on. I figure that since I will only be able to get another Arduino and ethernet shield at a later stage I may as well write it up for now. Below are a few pictures of the system completed:
With regards to the requirements for the system my part spec was as follows:
- One large reservoir – I got an 80 litre orange bucket for about R100
- Arduino + Ethernet shield – pretty stock standard
- 4x 10K resistors – used for the sensors
- 4x ‘sensors’ – sensors setup as before, coiled wire (soldered if you can) and taped on
- 8x galvanised steel washers – used as the actual sensors
- 2x transistors – used for the relay setup
- 2x relays – I used LT-5GS’ for this to switch the pumps on and off
- 2x Diodes – used for my relay setup
- 2x Water pumps – I used two (1 per pot) honestly because it was cheaper, although not as elegant as having a electrical valves and a more intricate watering system, mine were the 1.5A 12V bilge pumps (about R150 each)
- 2x Water pump power supplies – Obviously used for the pumps power, I used some cheap power adapters that didn’t cost much
- 1x Arduino power supply – See http://www.arduino.cc/playground/Learning/WhatAdapter for more information
- Wires, Tape, Tv Series, Patience – essential in setting this up :)
After getting the above its important to setup the environment:
Overall this shouldnt cost much, apart from the Arduino and Ethernet shield. The relays are about R10 each at electronics123 (thanks to schalk from H4H for picking one up for me).
So the system can be divded into a few easy parts:
-
- Sensors ( to measure soil moisture levels )
- Pump system (relays, diodes, transistors)
- Ethernet webserver (used to pull the stats as well as turn the pumps on and off)
Sensors:
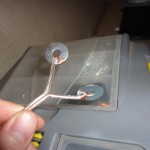
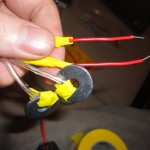
As before in the previous post – http://andrewmohawk.com/2011/10/07/automated-gardening-moisture-sensor/ the sensors are pretty simple to setup. I went and got a ton of electrical wiring for the pumps and so on and i needed rather long leads for the pots so I just used that. Basic idea is to simply wire up the galvanized washers as below:
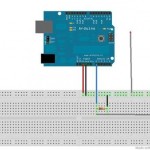
The basic idea with these sensors is to measure the resistance via a 10K resistor across two portions of the soil, I’ve stolen a very nice picture of the setup of these from the internets and is as follows:
(If someone has the original for this please let me know and I will link).
Anyway, once you have the sensors setup, I built 4- 2 per plant so i could measure the soil moisture at the top and bottom of the pots, you can simply wire them in as the above diagram. I wired mine up to analog ports 0-3.
Pump system (relays, diodes, transistors)
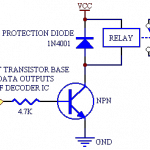
So this is obviously the more exciting part for me, since I get to play with something that I can turn on and off and get a more real world experience out of my digital life :) I had a few discussions about it with the guys from house4hack.co.za and they suggested i setup the relay in a standard way which is as follows:
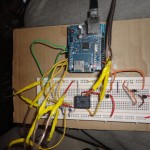
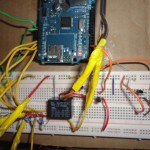
Basically use your data line connected to one of the Arduino digital ports and your relay as above. The transistor now allows you to use digitalWrite to turn the pumps on or off. Below is a closer picture of the one relay in place with the other removed:
You can see the sensor setup on the left of the board, relay one in the middle and the missing relay on the right. You can see the transistor and diode setup as well.
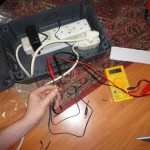
When connecting the power, its also important to make sure that you have the adapters the right way round, just use a multimeter to check you know which is the positive and which is the negative wire. We only bridge the positive via the relay, the ground/negative we leave as is:
Web setup:
So now we have a relay setup and the sensors, its really just a case of putting two and two together. We need a simple web interface that can do the following:
- Give us the readings for all 4 sensors
- Be able to control both pumps (switching on and off)
Ideally the system i have in mind is not completely controlled by the arduino, but also has a PC element to manage the water by the average soil moisture over time. Id want it to be customisable in a way that i can set the time period (say 2-6 hours) where it averages the soil moisture and determines if the pumps should be turned on or off. This is the reason I really want the webserver to essentially just spit out the values and offer me the ability to turn the pumps on and off.
Herewith is my Arduino Code:
//These includes are for the webduino addon for Arduino #include "SPI.h" #include "Ethernet.h" #include "WebServer.h" //Define the MAC and IP for our interface static uint8_t mac[] = { 0xDE, 0xAD, 0xBE, 0xEF, 0xFE, 0xED }; static uint8_t ip[] = { 192, 168, 1, 210 }; //Prefix #define PREFIX "/" WebServer webserver(PREFIX, 80); //Define which digital ports are used for which pump (mine are ports 3 and 4) #define pump1 3 #define pump2 4 //Variables used to indicate whether the pumps are on (1) or off (0) static int relayPump1 = 0; static int relayPump2 = 0; //Variables used to store the moisture readings int moisture_val1 = 0; int moisture_val2 = 0; int moisture_val3 = 0; int moisture_val4 = 0; //Variables used to store the analog ports used for the sensors (mine are 0-3) int moisture_sensor1 = 0; int moisture_sensor2 = 1; int moisture_sensor3 = 2; int moisture_sensor4 = 3; //Toggles the first pump void pumpOne(WebServer &server, WebServer::ConnectionType type, char *, bool) { server.httpSuccess(); if (type != WebServer::HEAD) { relayPump1 = !relayPump1; switchPumps(); } } //Toggles the second pump void pumpTwo(WebServer &server, WebServer::ConnectionType type, char *, bool) { server.httpSuccess(); if (type != WebServer::HEAD) { relayPump2 = !relayPump2; switchPumps(); } } //List the statistics for the webserver void getStats(WebServer &server, WebServer::ConnectionType type, char *, bool) { server.httpSuccess(); if (type != WebServer::HEAD) { moisture_val1 = analogRead(moisture_sensor1); moisture_val2 = analogRead(moisture_sensor2); moisture_val3 = analogRead(moisture_sensor3); moisture_val4 = analogRead(moisture_sensor4); server.print("Pump one: "); server.print(relayPump1); server.print(" Pump two: "); server.print(relayPump2); server.print(" Sensor 1: "); server.print(moisture_val1); server.print(" Sensor 2: "); server.print(moisture_val2); server.print(" Sensor 3: "); server.print(moisture_val3); server.print(" Sensor 4: "); server.print(moisture_val4); } } //Main loop void loop() { /* process incoming connections one at a time forever */ webserver.processConnection(); } //switch the pumps int switchPumps() { if(relayPump1 == 1) { digitalWrite(pump1,HIGH); //Serial.println("Pump1 Activated"); } else if(relayPump1 == 0) { digitalWrite(pump1,LOW); //Serial.println("Pump1 De-Activated"); } if(relayPump2 == 1) { digitalWrite(pump2,HIGH); //Serial.println("Pump2 Activated"); } else if(relayPump2 == 0) { digitalWrite(pump2,LOW); //Serial.println("Pump2 De-Activated"); } return 0; } //Setup the server - switch the pumps to OUTPUT void setup() { pinMode(pump1,OUTPUT); pinMode(pump2,OUTPUT); Ethernet.begin(mac, ip); webserver.setDefaultCommand(&getStats); webserver.addCommand("pumpOne", &pumpOne); webserver.addCommand("pumpTwo", &pumpTwo); webserver.addCommand("stats", &getStats); /* start the webserver */ webserver.begin(); } |
Completion:
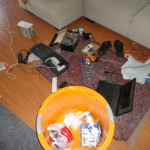
Once I’d completed the above sensors and arduino’s, I popped them into the waterproof container and was good to go with my final testing environment and container:
However my ethernet shield seems to have overheated and popped itself and the arduino, so I will need to get a replacement for them (feel free to donate me yours :D). Once i have this I will definitely include the server side code to manage the watering and web interface as well.
-AM
#include “SPI.h”
#include “Ethernet.h”
#include “WebServer.h”
//Define the MAC and IP for our interface
static uint8_t mac[] = { 0xDE, 0xAD, 0xBE, 0xEF, 0xFE, 0xED };
static uint8_t ip[] = { 192, 168, 1, 210 };
//Prefix
#define PREFIX “/”
WebServer webserver(PREFIX, 80);
//Define which digital ports are used for which pump (mine are ports 3 and 4)
#define pump1 3
#define pump2 4
//Variables used to indicate whether the pumps are on (1) or off (0)
static int relayPump1 = 0;
static int relayPump2 = 0;
//Variables used to store the moisture readings
int moisture_val1 = 0;
int moisture_val2 = 0;
int moisture_val3 = 0;
int moisture_val4 = 0;
//Variables used to store the analog ports used for the sensors (mine are 0-3)
int moisture_sensor1 = 0;
int moisture_sensor2 = 1;
int moisture_sensor3 = 2;
int moisture_sensor4 = 3;
//Toggles the first pump
void pumpOne(WebServer &server, WebServer::ConnectionType type, char *, bool)
{
server.httpSuccess();
if (type != WebServer::HEAD)
{
relayPump1 = !relayPump1;
switchPumps();
}
}
//Toggles the second pump
void pumpTwo(WebServer &server, WebServer::ConnectionType type, char *, bool)
{
server.httpSuccess();
if (type != WebServer::HEAD)
{
relayPump2 = !relayPump2;
switchPumps();
}
}
//List the statistics for the webserver
void getStats(WebServer &server, WebServer::ConnectionType type, char *, bool)
{
server.httpSuccess();
if (type != WebServer::HEAD)
{
moisture_val1 = analogRead(moisture_sensor1);
moisture_val2 = analogRead(moisture_sensor2);
moisture_val3 = analogRead(moisture_sensor3);
moisture_val4 = analogRead(moisture_sensor4);
server.print(“Pump one: “);
server.print(relayPump1);
server.print(“<br/>Pump two: “);
server.print(relayPump2);
server.print(“<br/>Sensor 1: “);
server.print(moisture_val1);
server.print(“<br/>Sensor 2: “);
server.print(moisture_val2);
server.print(“<br/>Sensor 3: “);
server.print(moisture_val3);
server.print(“<br/>Sensor 4: “);
server.print(moisture_val4);
}
}
//Main loop
void loop()
{
/* process incoming connections one at a time forever */
webserver.processConnection();
}
//switch the pumps
int switchPumps()
{
if(relayPump1 == 1)
{
digitalWrite(pump1,HIGH);
//Serial.println(“Pump1 Activated”);
}
else if(relayPump1 == 0)
{
digitalWrite(pump1,LOW);
//Serial.println(“Pump1 De-Activated”);
}
if(relayPump2 == 1)
{
digitalWrite(pump2,HIGH);
//Serial.println(“Pump2 Activated”);
}
else if(relayPump2 == 0)
{
digitalWrite(pump2,LOW);
//Serial.println(“Pump2 De-Activated”);
}
return 0;
}
//Setup the server – switch the pumps to OUTPUT
void setup()
{
pinMode(pump1,OUTPUT);
pinMode(pump2,OUTPUT);
Ethernet.begin(mac, ip);
webserver.setDefaultCommand(&getStats);
webserver.addCommand(“pumpOne”, &pumpOne);
webserver.addCommand(“pumpTwo”, &pumpTwo);
webserver.addCommand(“stats”, &getStats);
/* start the webserver */
webserver.begin();
}

Very very interesting!!!
HI,
We started a wiki at http://www.house4hack.co.za/wiki
would be great if you can add your hack there or at least create a stub under “hacks” that points to this awesome page you created.
also your advise to make it secure would be nice. we were spammed hours after launch! haha
chz man
Tobie
PS – i added on this page. feel free to improve
http://house4hack.co.za/wiki/index.php/H4hHacks
Awesome post and project! Can give more detail on the transistors, relays, diodes and the pump’s. i.e the part numbers and where you managed to source them. I am out in the West of JHB so anywhere in SA would be great, I preffer not to order oversea’s.