ZaCon V: Badge Sneak Peak *update*
UPDATE:
For those people that missed the friday night the code and slides are here:Slides: /Badger Badger Badger.pptx Code: https://github.com/AndrewMohawk/zaconv/
MAGICELECTRONICBADGES
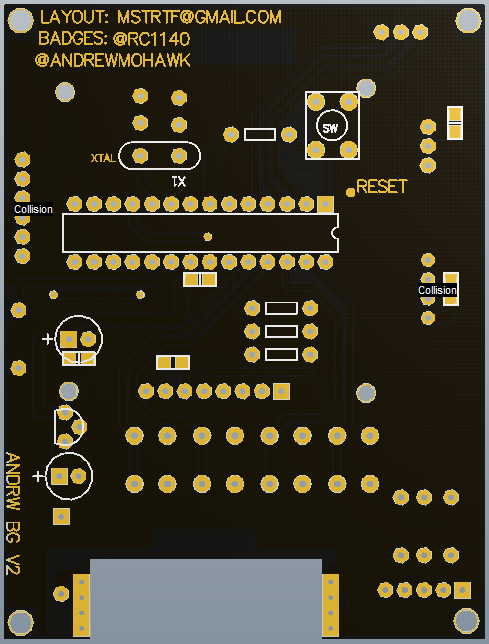
Ever since I first saw something Joe Grand, Adam Laurie or the Ninja networks team built I have loved the idea of having hackable electronics. So much that every year before ZaCon I foam at the mouth, put on my prettiest big boy pants and get out my Arduino in a vain attempt to make an electronic badge.…However every year all I end up with is a terrible video and a realization that electronics are not that cheap. Additionally I also find I have little to no knowledge on how to take anything off the Arduino dev board. This year however I finally built a badge. Its the first PCB I’ve ever made and its not on an Arduino dev board! I am generally surprised they boot up! The badges this year will look as follows:
![]()
Overview:
Down to the nitty gritty I guess. The badges consist of the following:* ATMEGA328 (aka, the chip in your Arduino) - in an IC socket * 433Mhz RF receiver (yes, the same as cars/garages) * 433Mhz RF transmitter * Nokia 5110 LCD * RGB LED * ICSP headers * 4x Push buttons
The badges work on the principle of hybrid-mesh-stuxnet-SCADA-badbios-in-the-cloud communication... no but really this is how it works:1. Each badge has a particular number (organised by status) 2. At a random interval it will transmit its badge number 3. While NOT transmitting badges will 'listen' for any other message data 4. If message data is decoded to one of a few types the LED will flash (this may change depending on battery life). Primary types are relationships and badge number transmissions 5. If a badge 'hears' another badges number it means it must be close enough for you to be talking and adds it to your 'friends' list (EEPROM) 6. When a badge transmits its number it ALSO transmits 1 of the last 5 'friends' that it has seen (a relationship) 7. If a badge 'hears' a relationship message it stores it in a 5 relationship wide array 8. When a badge transmits its number and a friends (see 6) it has it will ALSO transmit 1 of the last 5 relationships it has 'heard'
What this basically means is that if Luke and Annie are talking in the corner too far away from a receiver, but Leia is standing in between them and the receiver. Leia's badge can tell the receiver that Luke and Annie are talking :)Hackability:

The badges should be relatively easy to hack and hopefully will be a nice opening for people who want to start. As the badges are based on the Arduino you can literally pull out the chip from the back of the badge, plug it into your Arduino and upload code to it. For those who want to get wirey, you can simply connect your Arduino directly up to the ICSP headers and upload your code to the badge.
ICSP pins are as follows (looking at the front of the badge - with the screen - and the ICSP pins on the right) from top to bottom:
1. Digital 12 ( MISO ) 2. 5v 3. Digital 13 ( SCK ) 4. GND 5. RST 6. Digital 11 ( MOSI )
Additionally at the top of the board there are also the digital pins 0,1,2 that can be used for doing anything arduino-y. The LCD uses digital pins 8,9,10,11,12. RF TX uses digital pin 7 and RF RX uses digital pin 6. The buttons use A1,A2,A3,A4. Digital Pins 3,4,5 are all used for the RGB LED. And thats the lot of them. Of course you can simply use these for other things, just remember what they are connected to.Moneyshot:
Here is the very first speaker badge:
Video:
Here is a REALLY short video of 5 black badges 'talking' to each other (blue LEDs indicate messages received).Release
Their arent enough badges for everyone, naturally speakers get for adding research and putting in the time and effort required for a great talk. Everyone one else should sign up to the mailing list as we will be announcing how you can get a badge (hint: http://zacon.org.za/mail.html).There are 40 attendee badges and 20 build-your-own-boards for people who want to go the extra mile and solder their badge together (The badges are simple enough that even a first time solderererer should be able to do it! - and we will be there to help)
The badge talk will be on the Friday night before ZaCon (aka ZaCon Nights), so if you are interested in them keep the friday open!
Thanks
Honestly I can't thank the people that supported this project enough, from giving money so we can have badges to suggestions and ideas. Special shouts go to Jameel Haffejee (@RC1140) and Roelof Temmingh!(ASCII FLAMES HERE) -AM